Yellowknife, the capital city of the Northwest Territories, is a remote town in the north of Canada. Only a few kilometres from the Arctic Circle, it is the perfect location to see the Northern Lights during the wintertime.
At the beginning of 2024, we travelled to Yellowknife for 3 days to hopefully witness the aurora borealis, a bucket list dream of mine. Luckily, with 2024 being said to be one of the best years to see the northern lights, we were able to see them every night we were there.
Other than the northern lights, we also spent our days doing different activities such as visiting the city of Yellowknife, winter hiking, cross-country skiing, and walking on ice roads.
This 3 day itinerary around Yellowknife starts with your first full day on day 1, or when you will arrive in the early morning, and ending on day 3, which would be your last full day in Yellowknife. This itinerary was also ours when we travelled to Yellowknife in 2024.
In this guide, I will detail all the activities we did in Yellowknife, give my opinion on the activities, explain how to chase the northern lights, give you the best camera settings to capture northern lights, give you our packing list, and give you the cost of this trip, so you can plan your budget accordingly.
I hope that this travel guide to Yellowknife is helpful for your next trip!
General Information
The Aurora Borealis. Tours or no tours?
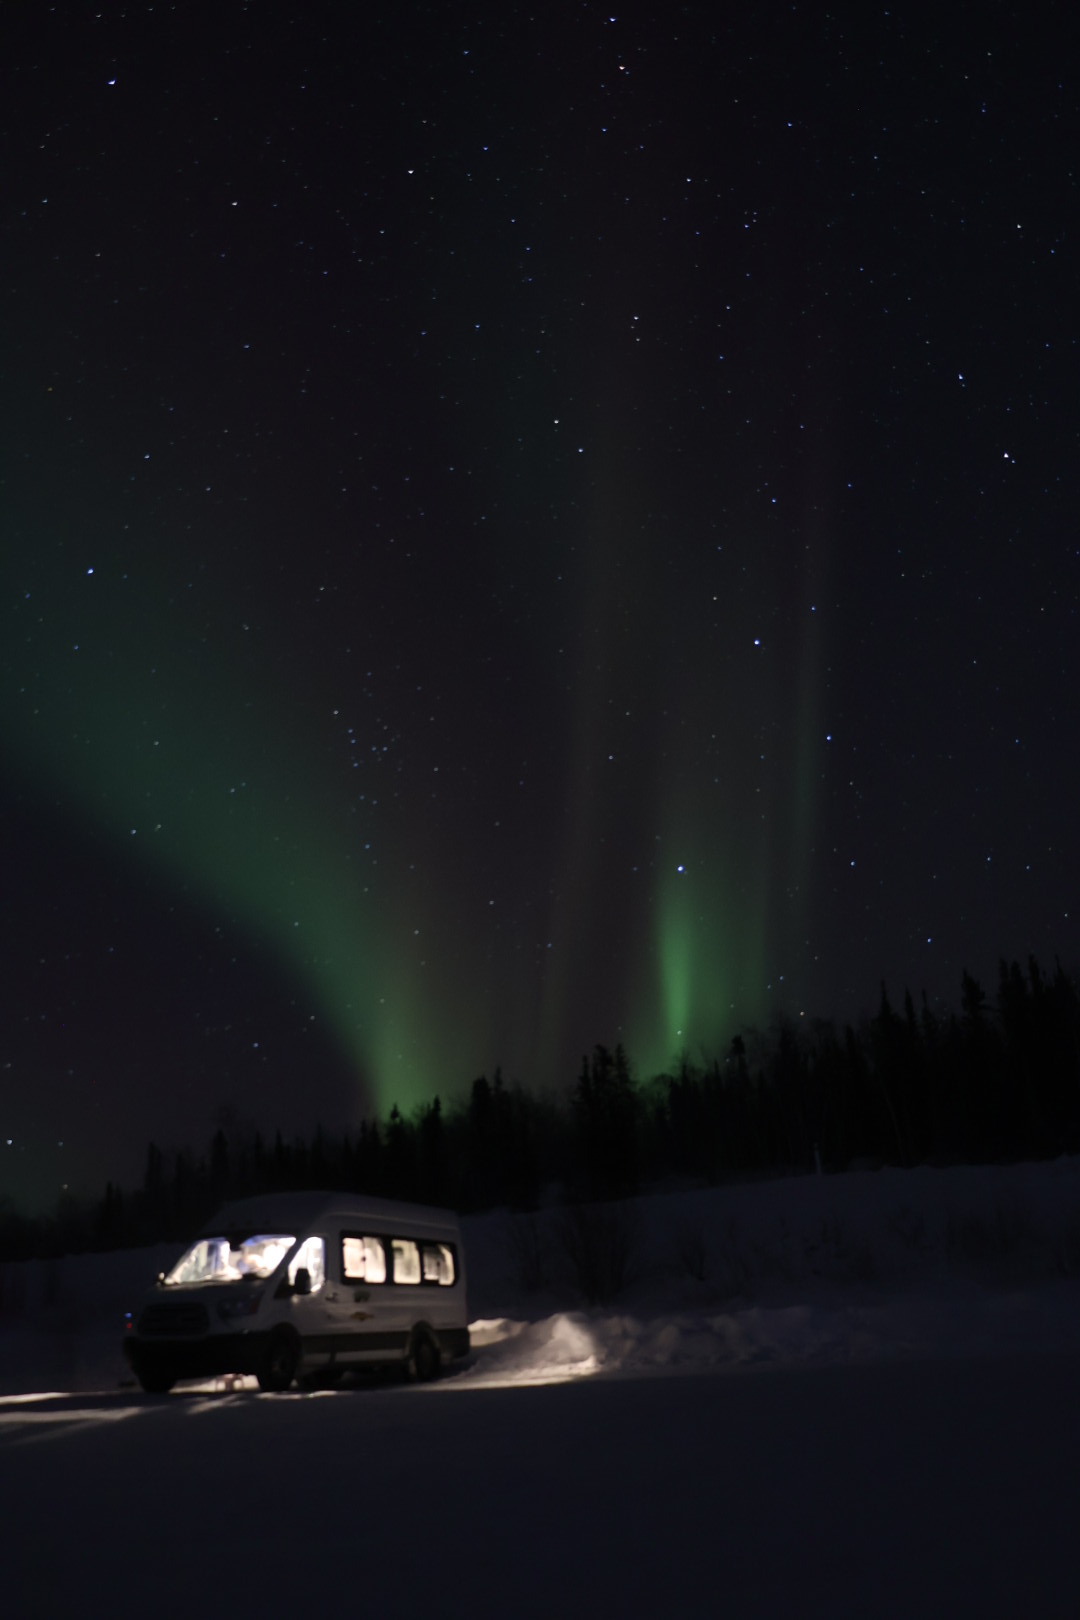
We opted for the no tour option because tours were a lot more expensive. A tour could cost around 150.00 CAD per person, so it would add up very quickly if we went to see the lights for four nights.
Instead, we rented a car. The car and gas cost us around 400.00 CAD, which is on the pricey side (Yellowknife isn’t a cheap destination), but it is a lot cheaper than going with tours.
I am very happy with the decision of not going with a tour. Northern lights are very easy to see, especially in Yellowknife. You only need to drive a few minutes out of the city, and you can just look up to see the lights. I will detail later the best places to go to.
If you do prefer an aurora tour, click here to book.
With who can I rent cars?
There are three car rental companies in Yellowknife.
- National Car Rental
- Budget Car Rental
- Gas Town Car Rentals
National and Budget are located at the Yellowknife airport. Gas Town is located a more in the city, but it is a locally owned company.
Click here to check the rental car options in Yellowknife.
Something to be aware of is that the rental car companies in Yellowknife have early closing hours, and afterwards, you cannot pick up your car. You must wait until the next day. For us, because our flight arrived at 8:00 pm, we had to pick up our rental at the airport the next day.

Where should we stay in Yellowknife?
We stayed at an Airbnb in the city. I recommend staying in the city. Depending on your budget, you can opt for hotels or guest houses.
Click here to see and book the different Hotels and Guest Houses in Yellowknife.
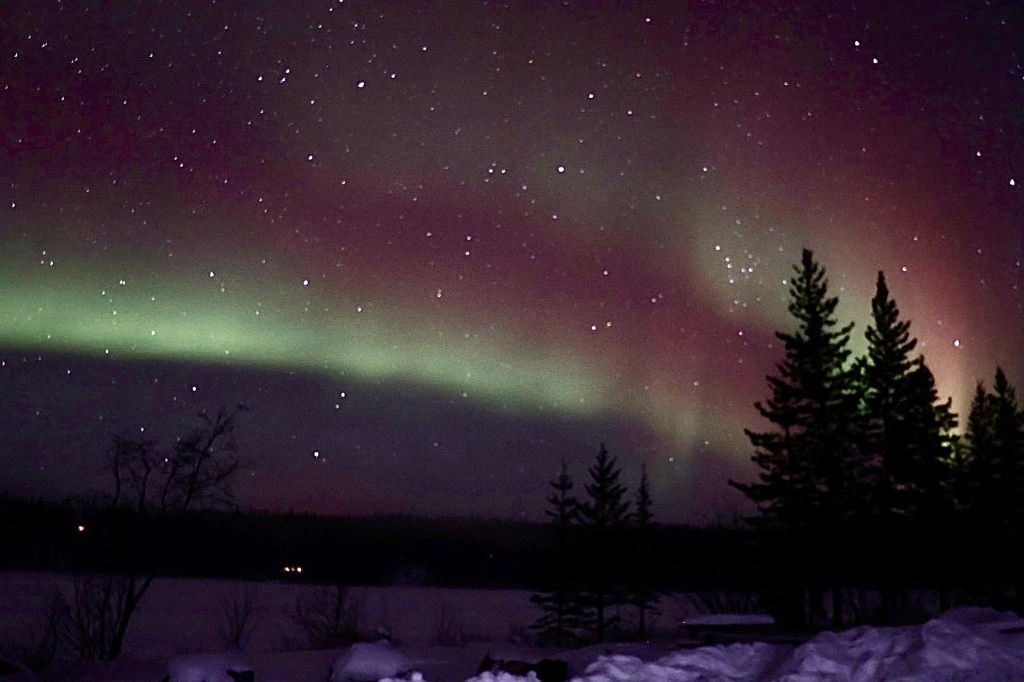
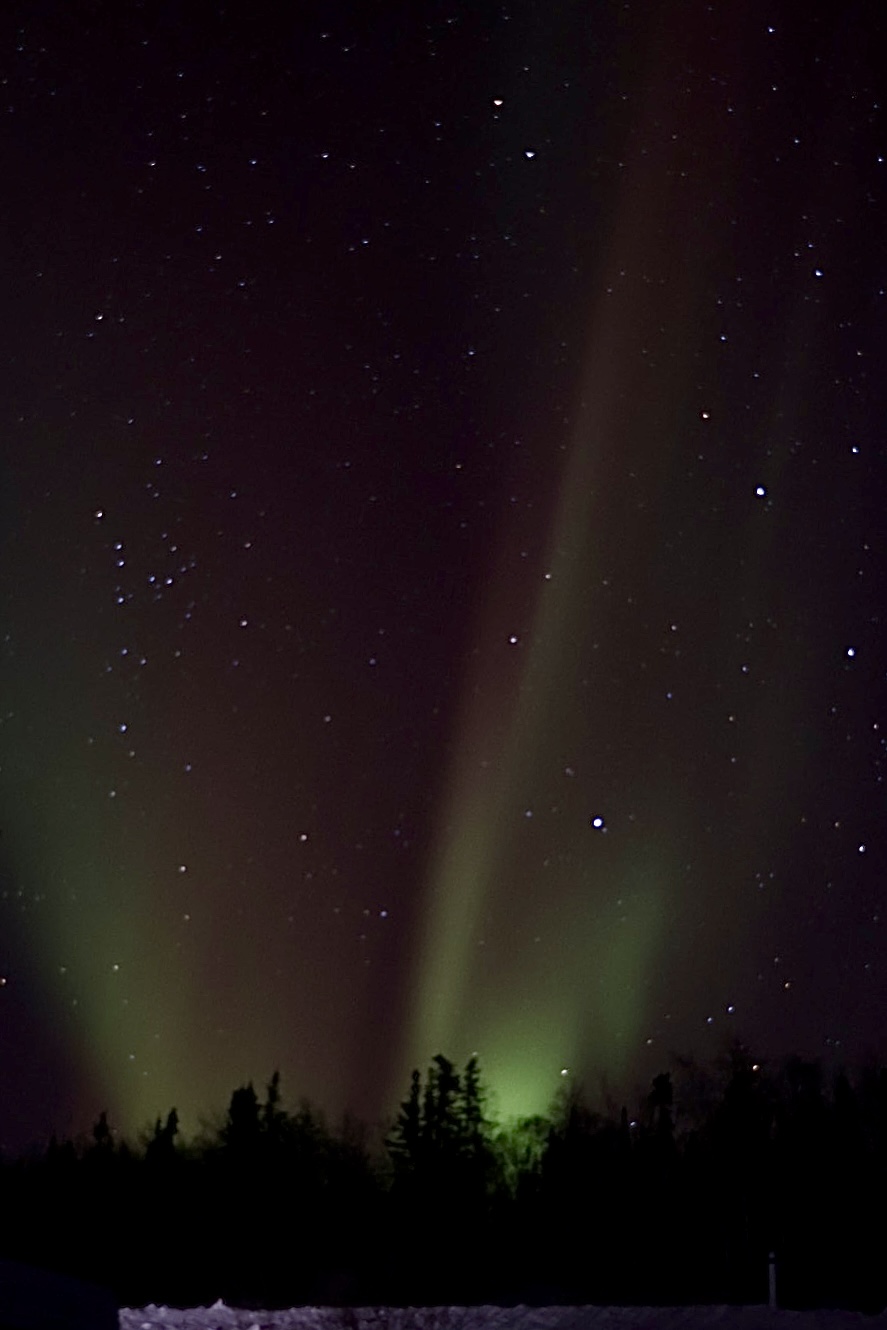
Where should I go to see the northern lights in Yellowknife?
At the airport, you will see these posters around. You can get one yourself if you would like.


The three aurora viewing locations that I recommend are Yellowknife River Territorial Park, Prosperous Lake Territorial Park and Madelline Lake Territorial Park.
Out of these three, my favourite was Madelline lake. At the other locations, there were a lot more other people. Having other people can be disturbing because they will come and go, which causes them to flash their car lights and use their flashlights, which affects your visibility of the lights. When we went to Madelline lake, there was only one other car that was present for a few minutes, and for the rest, we were all alone.
The reason I recommend those three locations is because they are close to the city, so you do not have to drive too far, but they are also further enough for you to see a clear sky without light pollution. Once you make it out of the city for 10 minutes, there isn’t a great different between certain locations because it all shares the same sky. Also, with our car rental, once we passed 150km, we had to pay extra for the extra kilometres. Therefore, we also wanted to minimize our extra kilometers, which made us stick to these three locations.
Something I was afraid about was the legitimacy of the parking lots marked on the map. Do the parking lots really exist? How big are they? The parking lots do indeed exist. When you enter the destination on Google Maps and zoom into the destination, it does not look like they have a designated spot for a parking lot. Well, good news, there indeed is space. The parking lots were a lot bigger than I expected.
At what time should I go to see the northern lights?
The northern lights are usually visible between 9:00 pm to 2:00 am as long as it is dark, with the peak times between 11:00 pm and midnight.
What are the grocery stores in Yellowknife?
The two stores where you can find groceries are Independent and Walmart. Independent sales specifically groceries, so I recommend going there. They have a lot more options.
How are the driving conditions in Yellowknife?
As someone who is from Montreal Canada, I found that the winter roads were not bad to drive on. I found that driving in the dark was a lot more difficult than driving on snow. On the Ingraham Trail, the famous highway in Yellowknife, there are no lights at night, so it is pitch dark. Make sure to turn on your high beans (and to remove them when there are oncoming cars).
If you do not feel confident driving in the winter, you can always opt for the option of tours.
What camera settings should I use to capture the northern lights?
I am myself no professional photographer. Actually, before this trip, I had never done night photography. After searching the internet for a while, I saw that the general settings were the following for my mirrorless camera:
- Manual mode
- Manual focus
- ISO 1600
- f/3.5 (or even lower if possible)
- 15″ (15 second shutter speed, not to be confused with 1/15)
For the ISO, the aperture and the shutter speed, I do recommend for you to play around with them to see the settings that you like best. Also, if the aurora is moving fast, you can try the shutter speed at 10 seconds instead of 15 in order to have a sharper image.
For timelapses with your mirrorless camera or DSLR, use the same settings as you would for your pictures, because timelapses on your camera is set to take multiple pictures.
If you have a phone, I suggest putting the shutter speed to the maximum. The phone will usually show a maximum shutter speed of 10 to 30 seconds when in darkness.

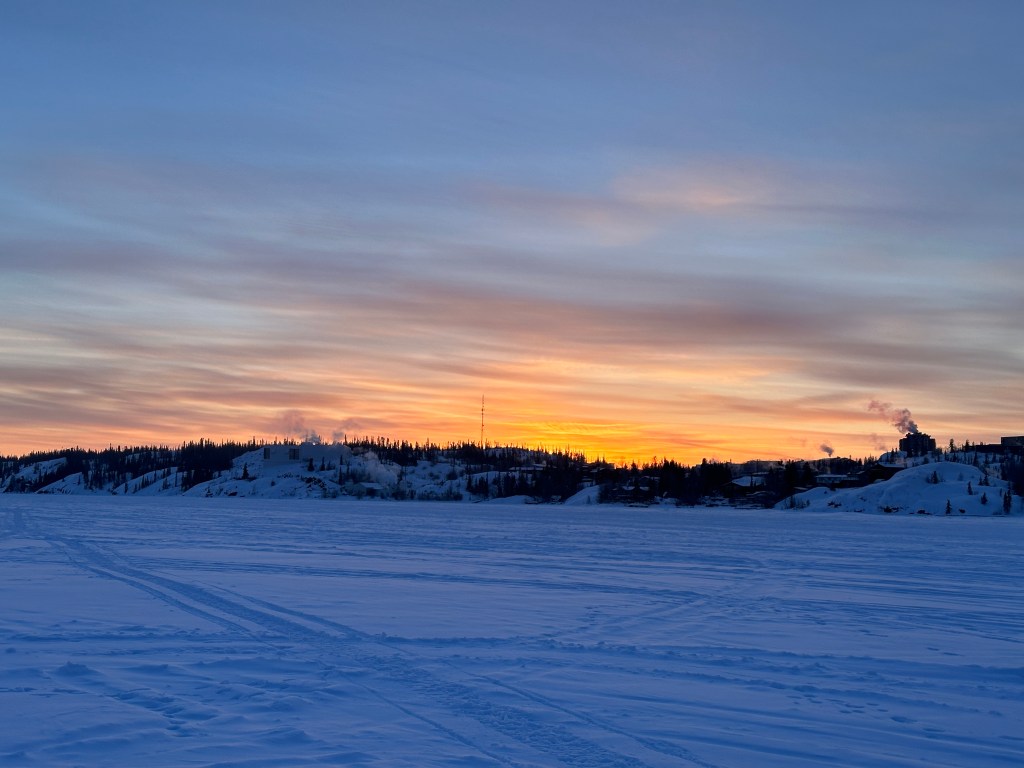
Before starting the itinerary, I would like to point out that the daylight in Yellowknife is very short during the winter. When we were there, the sunrise was at 10:00 am and the sunset was at 3:30 pm. This then lead us to chasing the daylight during the day, resting at our accommodation in the evening, and then chasing the northern lights until the late night.
Day 1: City Visit and Northern Lights
City Visit
I recommend taking the day to visit the city of Yellowknife. Everything can be done within a day. Here are some suggestions on what to visit:
- Prince of Wales Northern Heritage Centre
- Old Town
- Wildcat Cafe
- Dettah Ice Road
Note: Everything in this list is free, except the Wildcat Cafe.
The Prince of Wales Northern Heritage Centre is a museum that exhibits about the Indigenous culture and the history of Yellowknife. What’s great is that the entrance is free. The parking is also free.

At the Old Town, you can visit the Bush Pilots Monument. To get there, simply enter “Bush Pilots Monument” on Google Maps. Once you arrive, you will see that on Raccine Road, the road is very wide. You can park your car there, near the trees. You might even see other people park there. From the parking, it is a very short walk uphill to the monument.

Next to the Bush Pilots Monument, there is the Wildcat Cafe. Although we did not go because it was closed, you can stop by if you are interested. The building is considered a heritage site, and it is one of the most popular attractions in Yellowknife.
Because it was closed, we went to Bullock’s Bistro. We ordered the Fish & Chips and the Buffalo Ribeye. I personally loved the Buffalo Ribeye more. My rating for my experience is a 9/10.
The Dettah Ice Road is a highway in the Northwest Territories that is made out of ice. It is on a frozen lake. It is a road that connects the city of Yellowknife with the city of Dettah. During the winter, the lake is frozen, which creates a very unique driving experience. When we were there, the road was not frozen enough to allow cars to drive on it. They had apparently been having a very mild winter (although it was -35 celsius when we were there…). We were still able to walk on the ice road, which was a very surreal experience.
Northern Lights
On our first night, we went to Prosperous Lake Territorial Park to view the Northern Lights. It was an approximate 20 minutes drive from the city of Yellowknife. You can park at the designated parking lot. Do not park not on the side of the road! There are designated locations where you can park safely to view the northern lights.
Day 2: Hiking to Ice Cave and Northern Lights
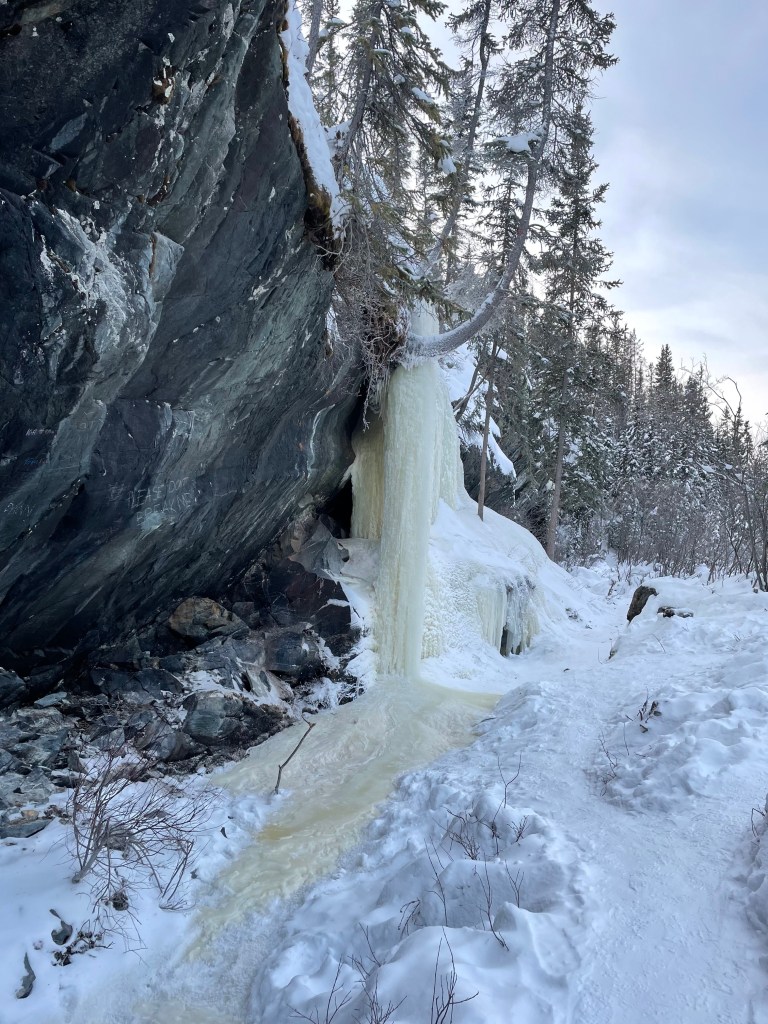
Ice Cave
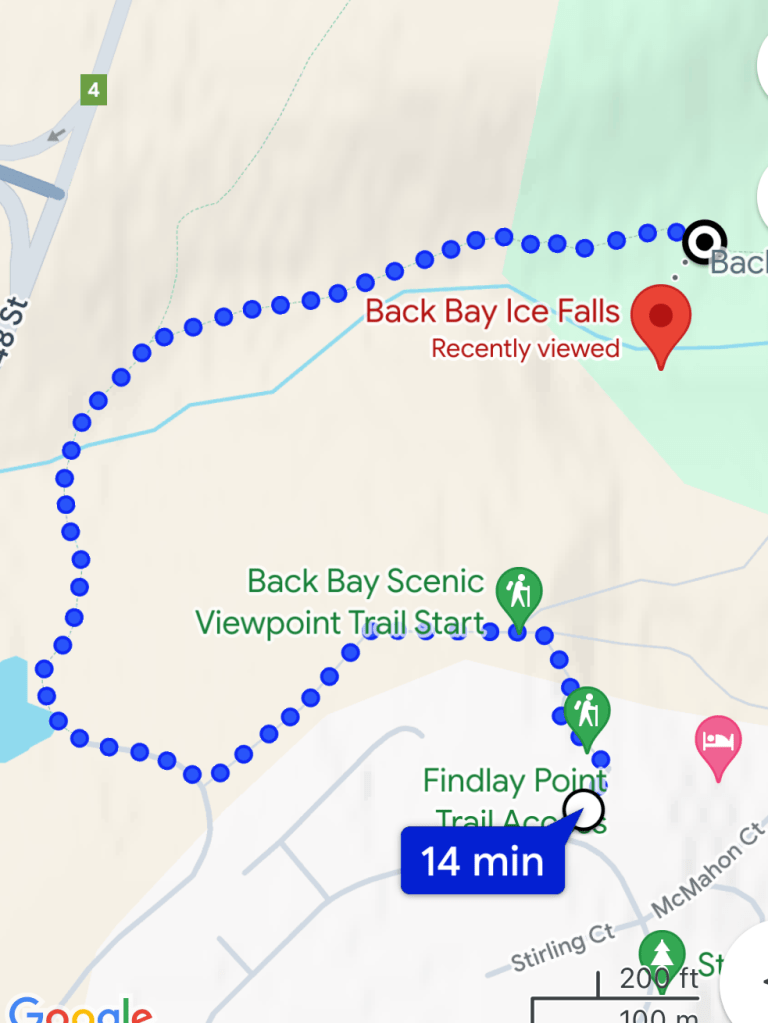
In the late morning, we went for a hike to the Ice Cave. The hike is 2.2km roundtrip. It has a total of 150m elevation gain. We however could not find the right way to the Ice Cave because there were no marked signs, and Google Maps was not reliable. Therefore, here is exactly how to get to the Ice Cave.
First, to park your car, make your way to “Findlay Point Trail Access” on Google Maps. Around that area, you can find parking along the street. We parked on Moyle Dr.
From Findlay Point Trail Access, search “Back Bay Ice Falls” on Google Maps. This will lead you the right way at first, but you cannot follow the road given until the end.

Northern Lights
We went to Madelline Lake Territorial Park, which was a 25 minute drive from the city of Yellowknife.


Day 3: Cross-Country Skiing and Northern Lights
Cross-country skiing
We rented our skis at “Overlander Sports.” They have a free parking lot. The price of the rental was 25.00 CAD per person for the full day, and it included a pair of skis and boots. Do pay attention to their opening times. We originally wanted to go on a Sunday, but the store is closed on Sundays. In fact, many stores are closed on Sundays in Yellowknife.
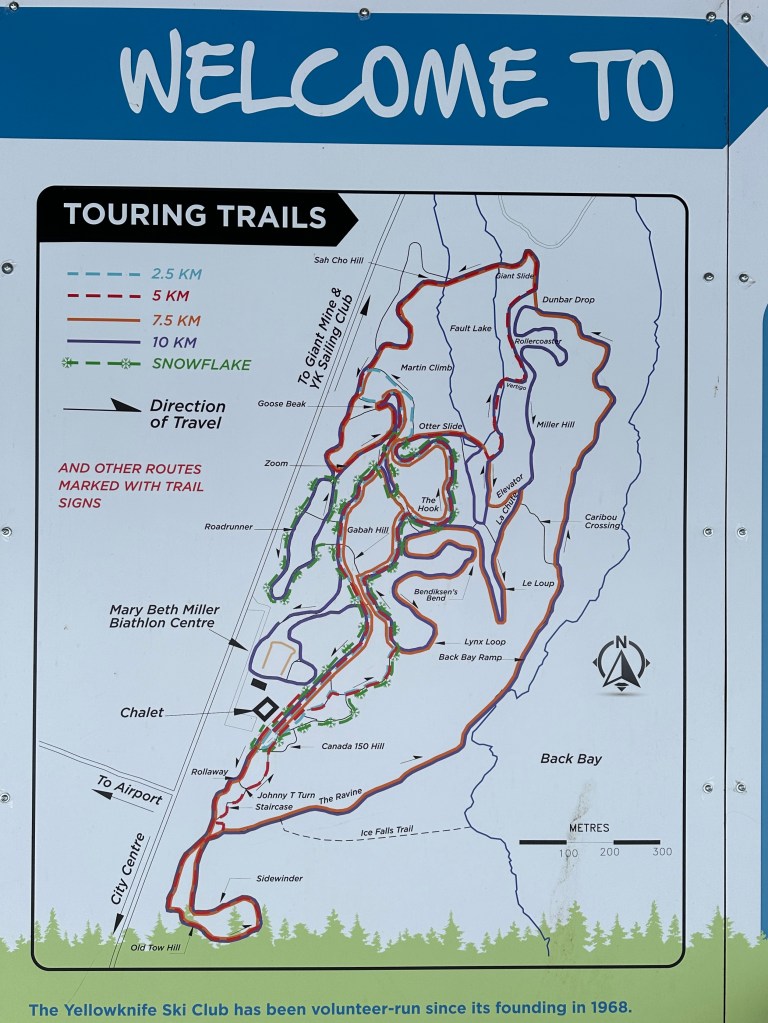
We then brought our skis to the “Yellowknife Ski Club Chalet.” When you rent at Overlander Sports, the entrance fee is included. The Chalet was the departure point of many different ski trails. They had trails ranging from 2.5km to 10km. We did the 10km trail in a bit less than 3 hours.
I really loved this activity. It is very possible to stay warm. In fact, I got easily cold during this trip, but when cross-country skiing, I did not get cold. You just need to make sure to dress accordingly.
Northern Lights
On your last night, you can go to Yellowknife River Territorial Park to view the northern lights. This location is the closest out of the three to the city, which is a 14 minute drive from the city.
Google Maps Pins
Here are all of the locations mentioned in the itinerary on Google Maps.
- Blue: Day 1
- Green: Day 2
- Purple: Day 3
Packing List
Clothes
- Thickest jacket
- Crewneck sweater
- Knit sweater
- Base long sleeve
- Leggings
- Sweatpants
- Snowpants
- Hat
- Thick gloves
- Thin gloves
- Neck warmer
- Scarf
- Socks
- Boots
- Underwear
- Pyjamas
Electronics
- Tripod
- Camera, lenses and charger
- Phone and charger
- Portable charger and charger
- Headphones
Hygiene
- Sleeping mask
- Hair products
- Teeth care
- Skin care
- Acetaminophen
Others
- Feet and hand warmers
- Wallet
- Passport
- Waterbottle
Costs
These costs are for two people. Do note that we only booked three nights of accommodation even though we technically stayed four nights in Yellowknife. This is because the following day, our flight was at 5:00 am. Since we would be out to see the northern lights until 2:00 am, we did not think that it would be beneficial to get an accommodation for the night. All costs are in CAD.
- Accommodation: 500.00
- Car rental: 375.00
- Gas: 60.00
- Groceries: 64.00
- Eating out: 200.00
- Cross-country ski rentals: 52.00
- Others: 15.00
